

Angels Landing, Zion National Park’s iconic hike, beckons adventurers with its breathtaking 360-degree views and thrilling ascent. But before you lace up your boots, be aware of the recent changes regarding permits and safety precautions. This guide will equip you with everything you need to know for a successful and unforgettable Angels Landing summit.
New Permit System: Plan Ahead!
As of April 1, 2022, permits were made mandatory for the entire Angels Landing hike, not just the summit section. There are two lottery systems to secure your permit:
- Seasonal Lottery: Apply for dates two months in advance. The lottery opens on the 1st and closes on the 20th of each month. Results are announced on the 25th.
- Day-Before Lottery: Apply anytime between midnight and 3:00 PM MT the day before your desired hike date. You’ll be notified by 4:00 PM MT.
Securing Your Permit:
Both lotteries involve a $6 non-refundable application fee, regardless of selection. Permits cover up to six people, but the number needs to be specified during application. If chosen, an additional $3 fee applies per hiker (excluding the first one covered by the application fee).
For detailed instructions and application links, visit the National Park Service’ official Angels Landing permit page.

Choosing Your Season:
Angels Landing is open year-round, but consider these factors:
- March-October (Peak Season): Warm weather and sunshine, but expect larger crowds.
- Winter (Off-Season): Smaller crowds, but potential ice and snow hazards. Dress warmly and check trail conditions beforehand.
Preparing for the Hike:
- Sturdy Hiking Shoes: Good traction is crucial on the sometimes slippery and uneven terrain.
- Sunscreen and Plenty of Water: Stay hydrated and protected, especially during hot summer months.
- Snacks and Lunch: Pack enough fuel for the 5-hour round trip hike.
- Layered Clothing: Temperatures can vary, so dress in layers you can adjust.
- Optional: Camera, map, sunglasses, and a backpack to carry your supplies.

A view of Angels Landing FROM the Observation Point Hike.
The Angels Landing Trail: A 5-Part Adventure
- West Rim Trail: A paved path with switchbacks offering scenic views of the canyon.
- Refrigerator Canyon: A shady, cooler section with lush vegetation.
- Walter’s Wiggles: A series of steep switchbacks with stunning overlooks.
- Scout Lookout: The turnaround point for many hikers, offering panoramic views. Here, you can decide if you’re ready for the final ascent.
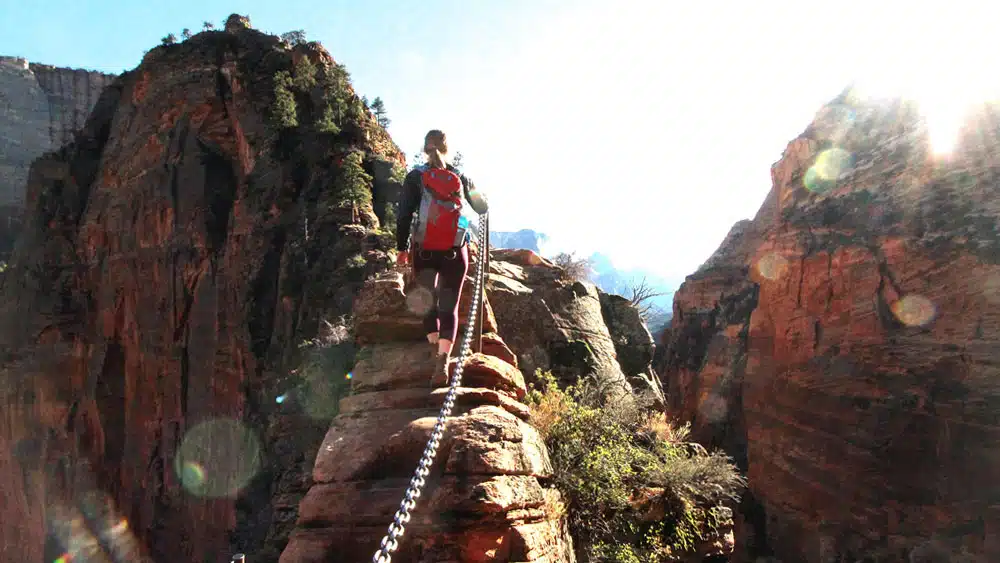
- Angels Landing Summit: A narrow ridge with chains for support. Hike with caution and enjoy the breathtaking reward at the top.
Safety First:
- Angels Landing is a challenging hike with drop-offs. Only proceed if comfortable with heights and confident in your physical ability.
- Use the provided chains for support on the final ascent.
- Be aware of your surroundings and weather conditions.
- Yield to uphill traffic and take your time.
Beyond the Hike:
Read more here, for more information on Zion National Park and Angels Landing info.
Also book your Zion stay nearby at Zion Ponderosa
